블로그 이름이 하루에 딱 한개만임에도 불구하고 포스팅 3개만에 지키지 못했다ㅠㅠ
간만에 자전거좀 탄다는걸 신나가지고 너무 빡세게 타서 몸살이온것! 덕분에 이틀동안 누워만 있었다...
암튼 이번에는 소셜로그인 연습을 할 생각이다. 원래는 구글로그인부터 해보려했지만 왜인지 구글 클라우드에서 프로젝트를 생성하고 설정할때 "앱을 저장하는 중에 오류가 발생했습니다"가 떠서 진행이 안됐다. 해결법을 찾지 못하여서 네이버부터 해본다
공식문서: https://developers.naver.com/docs/login/api/api.md
네이버 아이디로 로그인 API 명세 - LOGIN
'네이버 아이디로 로그인 API는 네이버 로그인 인증 요청 API, 접근 토큰 발급/갱신/삭제 요청API로 구성되어 있습니다. 네이버 로그인 인증 요청 API는 여러분의 웹 또는 앱에 네이버 로그인 화면을
developers.naver.com

Naver Developers에서 애플리케이션 생성하기
네이버 로그인 api를 사용하기 위해 오픈 api 사용 신청을 해준다.


서비스 URL은 네이버 로그인하기 버튼이 있는 페이지를 지정
Callback URL은 로그인 후 결과 페이지를 지정
적으라는 것들 적은 후 저장하기 누르면
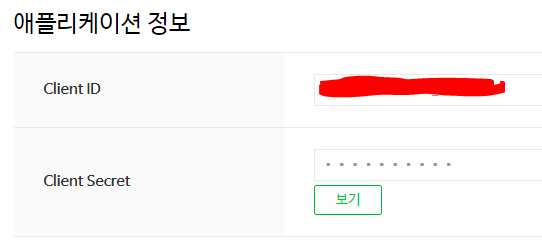
이렇게 ID와 Secret코드를 준다.
1. Client ID
2. Client Secret
3. 서비스 URL
4. Callback URL
이 네가지 정보를 활용하여 간단한 컨트롤러와 뷰를 작성해보자.
전체적인 구조는

이와같이 매우 간단하게 구성했다.
UserController.java
package com.example.loginapiprac.controller;

import lombok.extern.slf4j.Slf4j;
import org.springframework.stereotype.Controller;
import org.springframework.web.bind.annotation.RequestMapping;
import org.springframework.web.bind.annotation.RequestMethod;

import javax.servlet.http.HttpSession;

@Controller
@Slf4j
public class UserController {

    @RequestMapping(value="/", method= RequestMethod.GET)
    public String index() {
        log.info("home controller");
        return "APIExamNaverLogin";
    }

    @RequestMapping(value="login/oauth2/code/naver", method=RequestMethod.GET)
    public String loginPOSTNaver(HttpSession session) {
        log.info("callback controller");
        return "callback";
    }
}
첫번째 메서드는 로그인 버튼이 있는 뷰페이지를 반환하고 두번째 메서드는 로그인 이후 보여질 페이지를 반환한다.
두번째 메서드의 value="/login/oauth2/code/naver"는 네이버 개발자 페이지에서 지정한 Callback URL과 통일시켜준다.
APIExamNaverLogin.html
<!doctype html>
<html lang="ko">
<head>
    <meta charset="utf-8">
    <title>네이버 로그인</title>
    <script type="text/javascript" src="https://static.nid.naver.com/js/naverLogin_implicit-1.0.3.js" charset="utf-8"></script>
    <script type="text/javascript" src="http://code.jquery.com/jquery-1.11.3.min.js"></script>
</head>
<body>
<!-- 네이버아이디로로그인 버튼 노출 영역 -->
test
<div id="naver_id_login"></div>
<!-- //네이버아이디로로그인 버튼 노출 영역 -->
<script type="text/javascript">
    var naver_id_login = new naver_id_login("Client_ID", "http://localhost:8080/login/oauth2/code/naver");
    var state = naver_id_login.getUniqState();
    naver_id_login.setButton("white", 2,40);
    naver_id_login.setDomain("http://localhost:8080/");
    naver_id_login.setState(state);
    naver_id_login.setPopup();
    naver_id_login.init_naver_id_login();
</script>
</body>
</html>
callback.html
<!doctype html>
<html lang="ko">
<head>
    <script type="text/javascript" src="https://static.nid.naver.com/js/naverLogin_implicit-1.0.3.js"
            charset="utf-8"></script>
    <script type="text/javascript" src="http://code.jquery.com/jquery-1.11.3.min.js"></script>
</head>
<body>
callback
<script type="text/javascript">
    var naver_id_login = new naver_id_login("Client_ID", "http://localhost:8080/login/oauth2/code/naver");
    // 접근 토큰 값 출력
    alert(naver_id_login.oauthParams.access_token);
    // 네이버 사용자 프로필 조회
    naver_id_login.get_naver_userprofile("naverSignInCallback()");

    // 네이버 사용자 프로필 조회 이후 프로필 정보를 처리할 callback function
    function naverSignInCallback() {
        alert(naver_id_login.getProfileData('email'));
        alert(naver_id_login.getProfileData('nickname'));
        alert(naver_id_login.getProfileData('age'));
        alert(naver_id_login.getProfileData('id'));
        alert(naver_id_login.getProfileData('birthday'));
        alert(naver_id_login.getProfileData('gender'));
        alert(naver_id_login.getProfileData('mobile'));
    }

</script>
</body>
</html>
실행결과

이렇게 귀여운 네이버 로그인 버튼이 생기는것을 확인할 수 있다. 이걸 클릭하면


등등 요청한 나의 네이버 계정 정보가 다 받아진다.
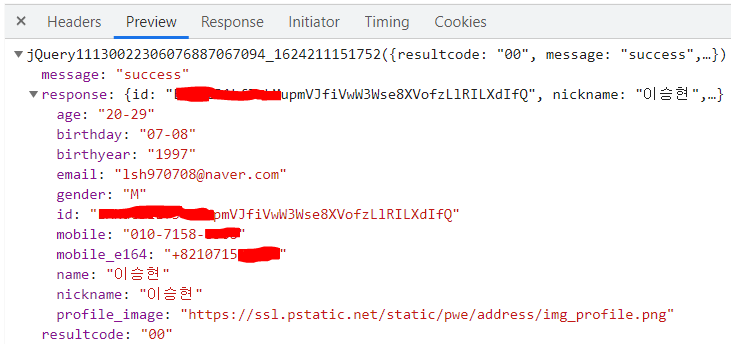
개발자도구에서 넘어온 json파일을 확인할 수 있다.
Naver Developers에 따르면 요청과 응답은 다음과 같은 형식으로 진행된다고 한다.
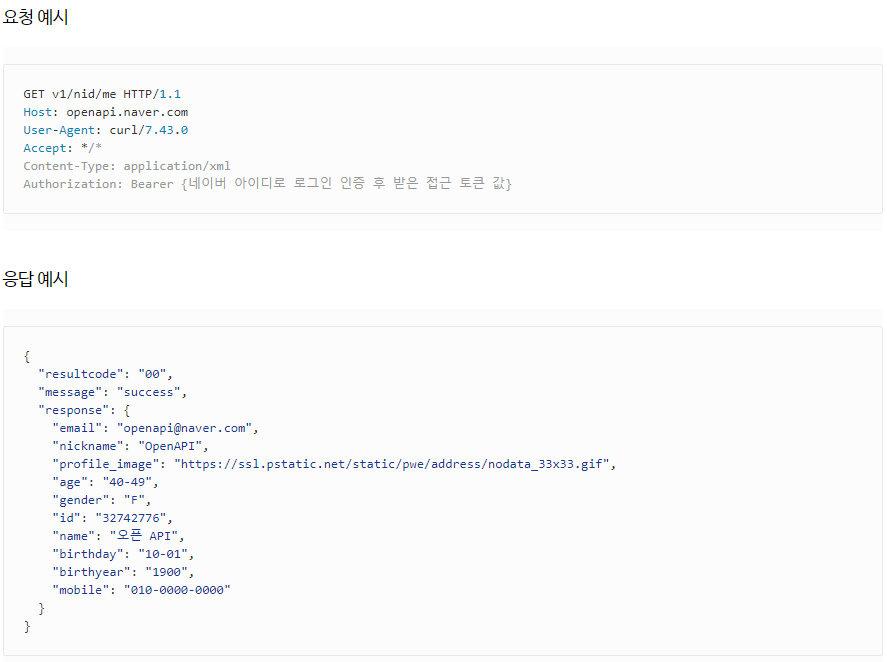
여기에 하나씩 살을 붙혀가며 발전시켜 봐야겠다.
참고: https://thiago6.tistory.com/44
'Spring' 카테고리의 다른 글
| [Spring] JWT를 사용한 로그인 구현 1 (2) | 2021.08.02 |
|---|---|
| [Spring] H2 데이터베이스 사용하기 (0) | 2021.08.01 |
| [Spring] 카카오 아이디로 로그인하기 - 2 (0) | 2021.07.29 |
| [Spring] 카카오 아이디로 로그인하기 - 1 (0) | 2021.07.28 |
| [Spring] Spring이란 (0) | 2021.06.24 |