1. 구현하고자 하는 것
인증은 Firebase에서,
인가는 Spring Security로,
구성하려고 한다.
이후 Controller에서 @PreAuthorize를 통해서 요청을 제한하고자 한다.
즉, Firebase에서 발급한 JWT를 Spring Security에서 사용하기.
인증 - 유저가 누구인지 확인하는 절차
인가 - 유저가 요청한 요청(request)을 실행할 수 있는지를 확인하는 절차
2. 현재까지 구현된 것
nodejs로 구현한 회원가입 로직에 firebase-admin를 사용하여 Firebase에 유저 생성 및 권한등록을 해주었다.
import * as admin from 'firebase-admin';

export const createFirebaseUser = (email: string, password: string, name: string) => {
  return admin.auth().createUser({
    email: email,
    password: password,
    displayName: name,
    disabled: false,
  });
};
firebase-admin 라이브러리로 firebase에 새로운 user를 등록해 주었고
import * as admin from 'firebase-admin';

export const setRole = (uid: string, role: string) => {
  let claims = {
      group: role,
  };
  admin.auth().setCustomUserClaims(uid, claims)
};
firebase-admin 라이브러리로 { group: role } 이라는 customUserClaim을 생성해주었다.
이것 자체로 권한으로써의 역할을 하진 않고 그저 사용자 설정 클레임일 뿐이다.
여기까지가 현재 진행 상태였고,
우리의 목표는 Spring에서 이 클레임을 사용자의 ROLE로 인식되게 하는 것이다.

3. JwtFilter 구현
    @PostMapping("")
    @PreAuthorize("hasAnyRole('admin', 'partner')")
    fun postEvent(@Valid @RequestBody req: PostEventRequest): ResponseEntity<Any> {
        println("postEvent")
        return ResponseEntity.status(201).body(object {
            val data = eventService.createOneEvent(req)
        })
    }
이렇게 컨트롤러에 @PreAuthorize 어노테이션을 통해서 사용자의 접근을 걸러낼 수 있어야한다.
저 컨트롤러로 들어가는 request에서 권한을 어떻게 추출하여 걸러낼 수 있을까?
- Firebase JWT에서 group을 추출하여 role을 얻어낸다.
- 이 role을 UserDetails 객체를 만들고 넣어준다.
- UserDetails 객체를 SecurityContextHolder에 등록해준다.
이 로직을 Filter로 구현하여 Filter를 등록해주자.
참고로, @PreAuthorize 안에서 다양한 표현식을 사용할 수 있다.
https://docs.spring.io/spring-security/site/docs/3.0.x/reference/el-access.html#el-common-built-in
15. Expression-Based Access Control
There are some built-in expressions which are specific to method security, which we have already seen in use above. The filterTarget and returnValue values are simple enough, but the use of the hasPermission() expression warrants a closer look. The Permiss
docs.spring.io
1. Firebase JWT로부터 Custom Claim 추출하기
val accessToken = request.getHeader("Authorization").split(" ")[1]JWT 토큰이 Header에 Authorization: Bearer {jwt token} 형식으로 요청되어지기에 공백을 기준으로 뒷 덩어리를 가져온다.
2. JWT Token 검증하기
val decodedToken: FirebaseToken = FirebaseAuth.getInstance().verifyIdToken(accessToken)
val uid: String = decodedToken.uid
val role: String = decodedToken.claims["group"] as String
Firebase Admin를 통해서 verify한다.
시간이 만료되었거나 잘못된 토큰일 경우 FirebaseAuthException이나 IllegalArgumentException을 뱉는다.
3. SecurityContextHolder에 UserDetails 객체를 생성하여 등록하기
val userDetails: UserDetails =
    User.builder().username(uid).authorities(SimpleGrantedAuthority(role)).roles(role).password("").build()
val authentication = UsernamePasswordAuthenticationToken(
    userDetails, null, userDetails.authorities
)
SecurityContextHolder.getContext().authentication = authentication
위 3단계를 합치고 예외 몇 가지를 지정해준 JwtFilter 코드는 다음과 같다.
class JwtFilter: OncePerRequestFilter() {

    @Throws(ServletException::class, IOException::class)
    override fun doFilterInternal(
        request: HttpServletRequest,
        response: HttpServletResponse,
        filterChain: FilterChain
    ) {
        try {
            val accessToken =
                request.getHeader("Authorization").split(" ")[1]
            val decodedToken: FirebaseToken = FirebaseAuth.getInstance().verifyIdToken(accessToken)
            val uid: String = decodedToken.uid
            val role: String = decodedToken.claims["group"] as String
            val userDetails: UserDetails =
                User.builder().username(uid).authorities(SimpleGrantedAuthority(role)).roles(role).password("").build()
            val authentication = UsernamePasswordAuthenticationToken(
                userDetails, null, userDetails.authorities
            )
            SecurityContextHolder.getContext().authentication = authentication
        } catch (e: FirebaseAuthException) {
            response.status = HttpStatus.SC_UNAUTHORIZED
            response.contentType = "application/json"
            response.writer.write("{\"code\":\"INVALID_TOKEN\", \"message\":\"" + e.message + "\"}")
            return
        } catch (e: IllegalArgumentException) {
            response.status = HttpStatus.SC_UNAUTHORIZED
            response.contentType = "application/json"
            response.writer.write("{\"code\":\"INVALID_TOKEN\", \"message\":\"" + e.message + "\"}")
            return
        } catch (e: NoSuchElementException) {
            response.status = HttpStatus.SC_UNAUTHORIZED
            response.contentType = "application/json"
            response.writer.write("{\"code\":\"USER_NOT_FOUND\"}")
            return
        } catch (e: NullPointerException) {
            response.status = HttpStatus.SC_BAD_REQUEST
            response.contentType = "application/json"
            response.writer.write("{\"code\":\"AUTHORIZATION_HEADER_NOT_FOUND\"}")
            return
        } catch (e: Exception) {
            e.printStackTrace()
            return
        }
        filterChain.doFilter(request, response)
    }
}
4. Filter 등록
이렇게 구현한 Filter를 Spring Security의 Filter Chain에 등록해준다.
@Configuration
@EnableGlobalMethodSecurity(securedEnabled = true, jsr250Enabled = true, prePostEnabled = true)
class WebSecurityConfig: WebSecurityConfigurerAdapter(){

    @Throws(java.lang.Exception::class)
    override fun configure(web: WebSecurity) {
        web.ignoring()
            .antMatchers("/")
            .antMatchers("/ping")
    }

    @Throws(Exception::class)
    override fun configure(http: HttpSecurity) {
        http
            .cors().disable()
            .csrf().disable()
            .authorizeRequests()
            .antMatchers("/v1/**").authenticated().and()
            .addFilterBefore(
                JwtFilter(),
                UsernamePasswordAuthenticationFilter::class.java
            )
            .exceptionHandling()
            .authenticationEntryPoint(HttpStatusEntryPoint(HttpStatus.UNAUTHORIZED))
    }
}
@PreAuthorize가 동작하지 않으면 다음을 추가해주자
@EnableGlobalMethodSecurity(securedEnabled = true, jsr250Enabled = true, prePostEnabled = true)
5. 동작확인
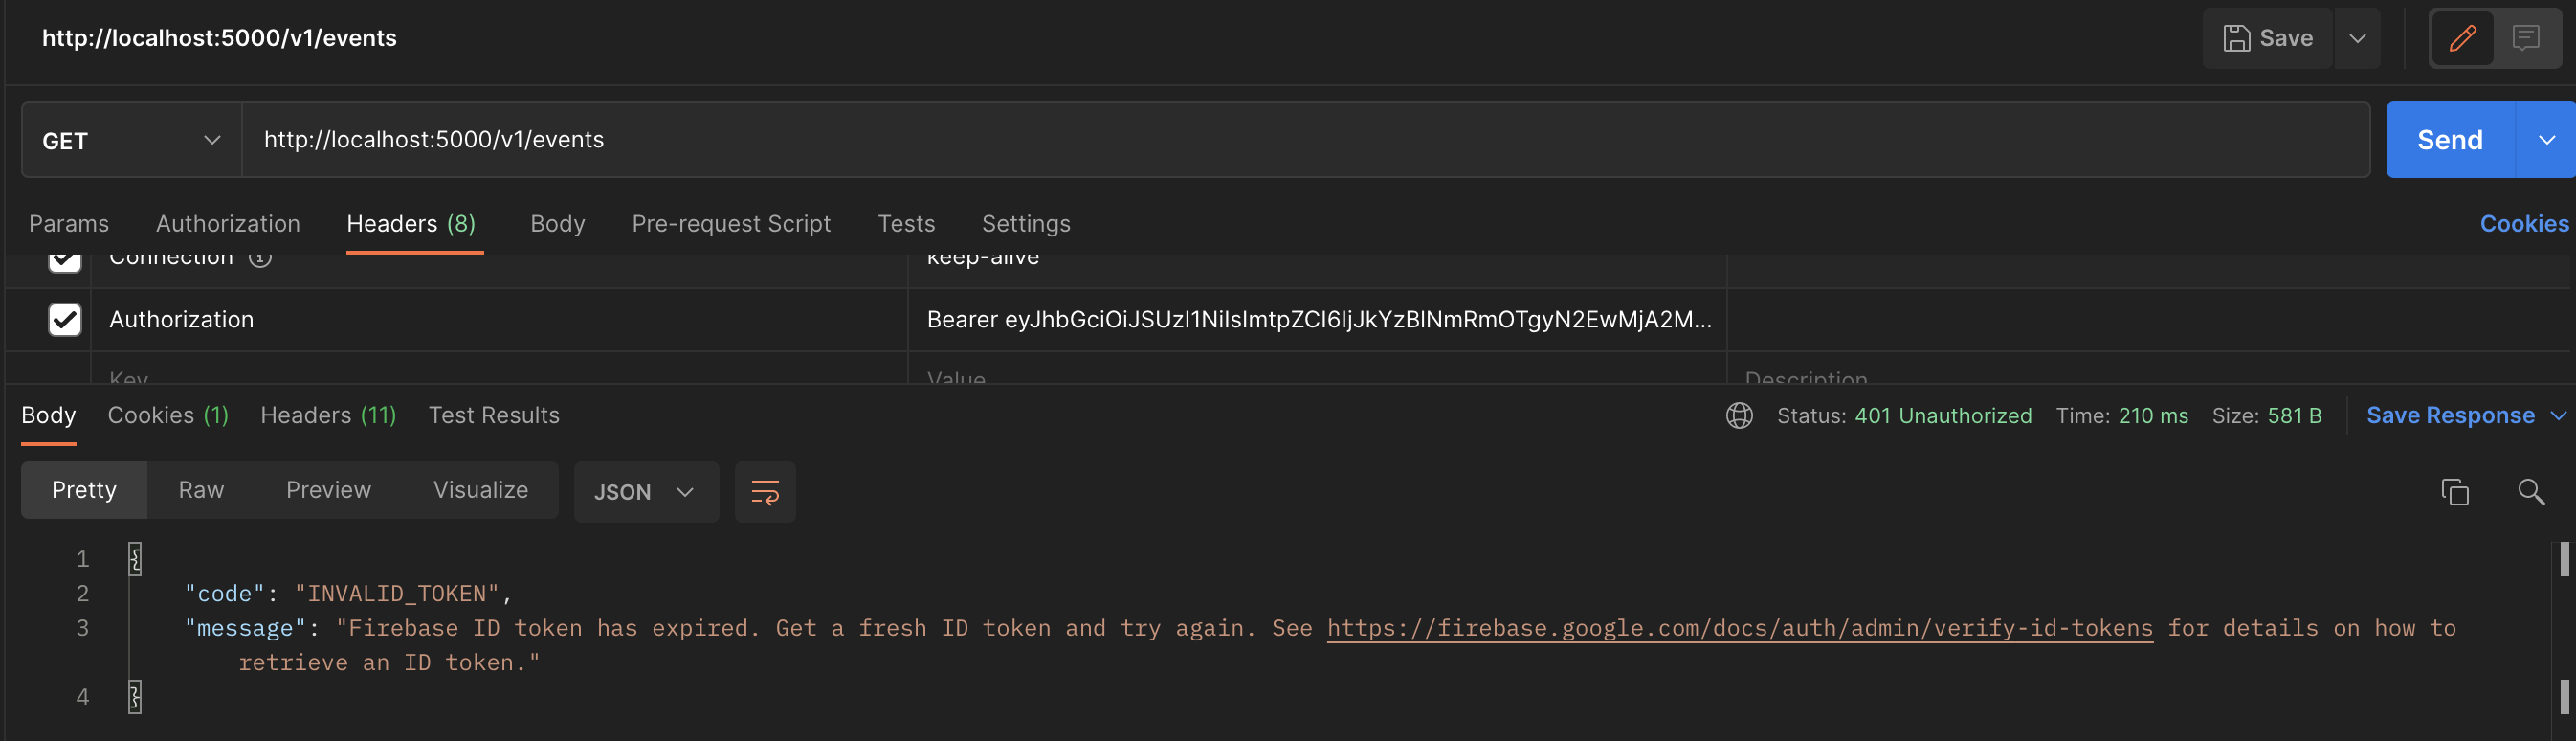
만료된 JWT Token으로 접근을 시도하면 401을 뱉으며 잘 쳐내는 것을 볼 수 있다.
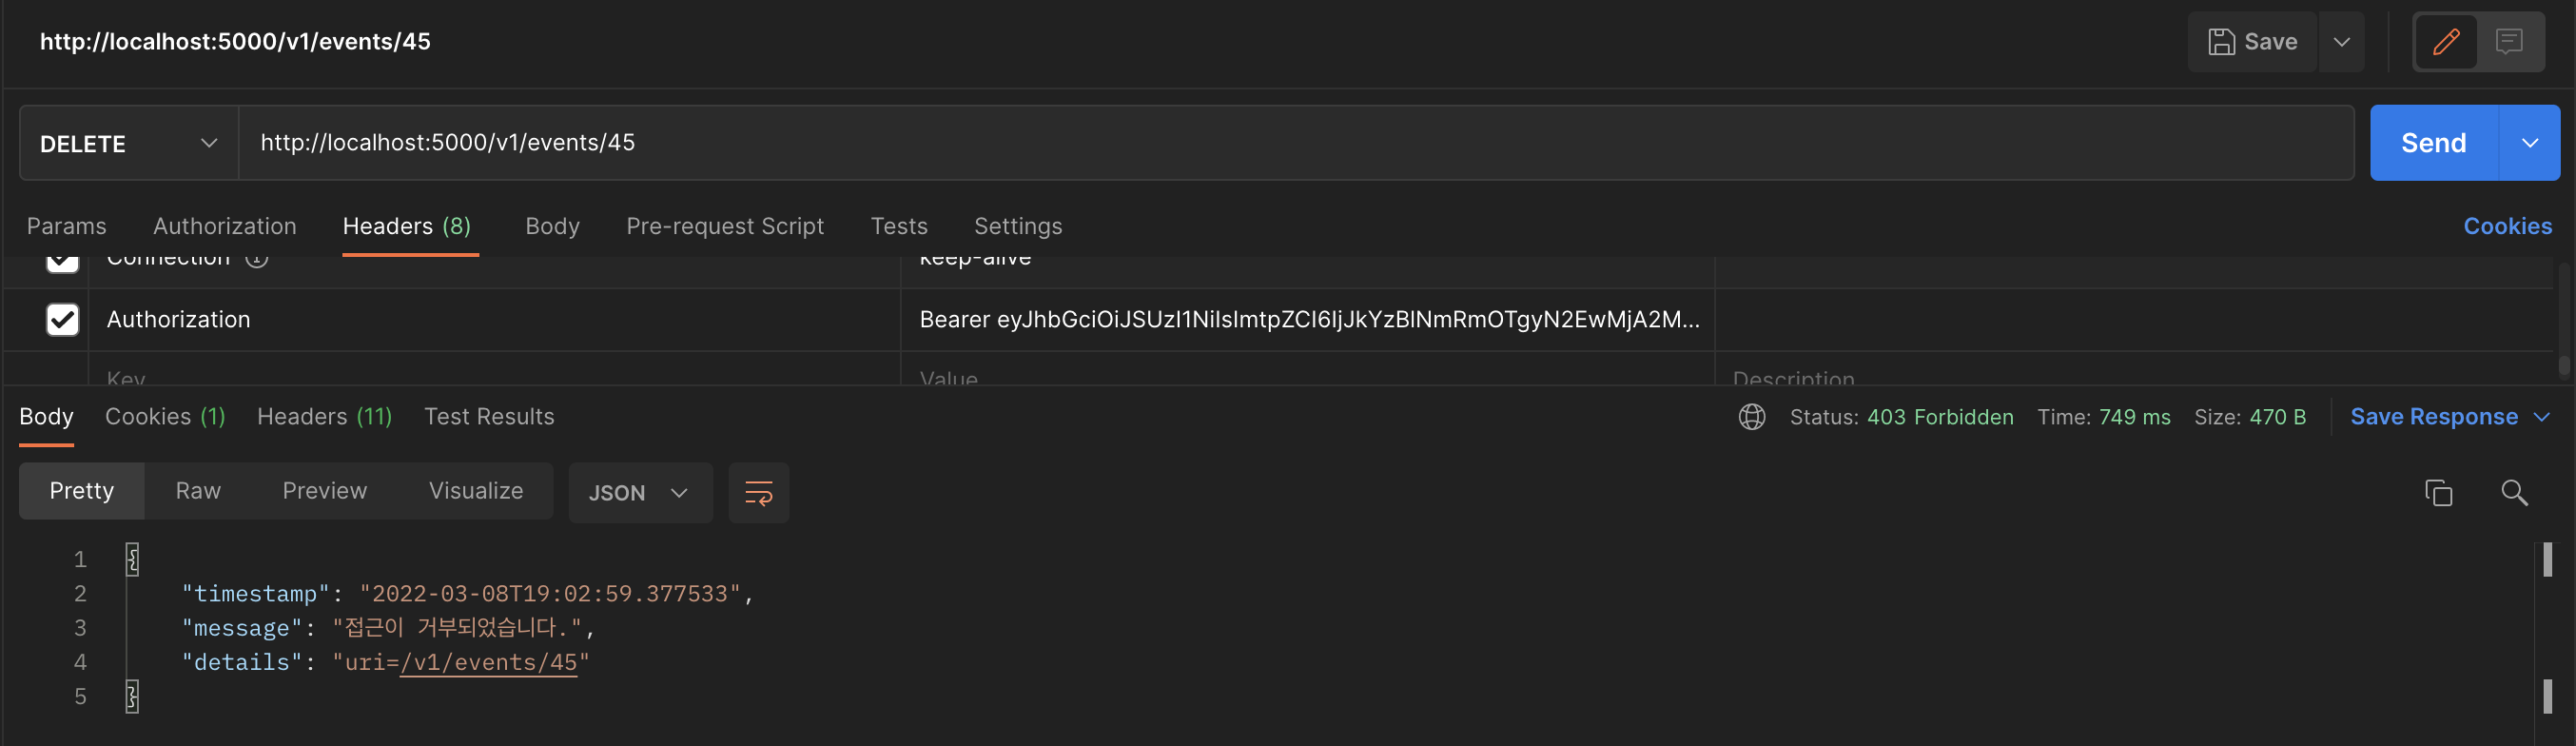
권한에 맞지 않는 api에 접근을 시도하면 403을 뱉으며 잘 쳐내는 것을 볼 수 있다.
참고:
Spring Security - 인증 절차 인터페이스 구현 (1) UserDetailsService, UserDetails
UserDetailsService 인터페이스는 DB에서 유저 정보를 가져오는 역할을 한다. 해당 인터페이스의 메소드에서 DB의 유저 정보를 가져와서 AuthenticationProvider 인터페이스로 유저 정보를 리턴하면, 그 곳
to-dy.tistory.com
https://debugdaldal.tistory.com/89
[SPRING SECURITY] 4.스프링 시큐리티 로그인 커스터마이징
1) 커스터 마이징을 위한 .java, .jsp CustomAuthenticationProvider.java (DB에서 사용자 불러와 권한조회 하기) - 에 추가한 클래스로써 권한확인 작업을 한 후 return result;를 하면 result의 내용이 에서 d..
debugdaldal.tistory.com
'Spring' 카테고리의 다른 글
| [Spring] Spring Security에서 HttpSecurity와 WebSecurity의 차이 (0) | 2022.02.16 |
|---|---|
| [Spring] JWT Refresh Token을 사용한 로그인과 고찰 (7) | 2021.08.20 |
| [Spring] JWT를 사용한 로그인 구현 1 (2) | 2021.08.02 |
| [Spring] H2 데이터베이스 사용하기 (0) | 2021.08.01 |
| [Spring] 카카오 아이디로 로그인하기 - 2 (0) | 2021.07.29 |